Category

Recipes

Category

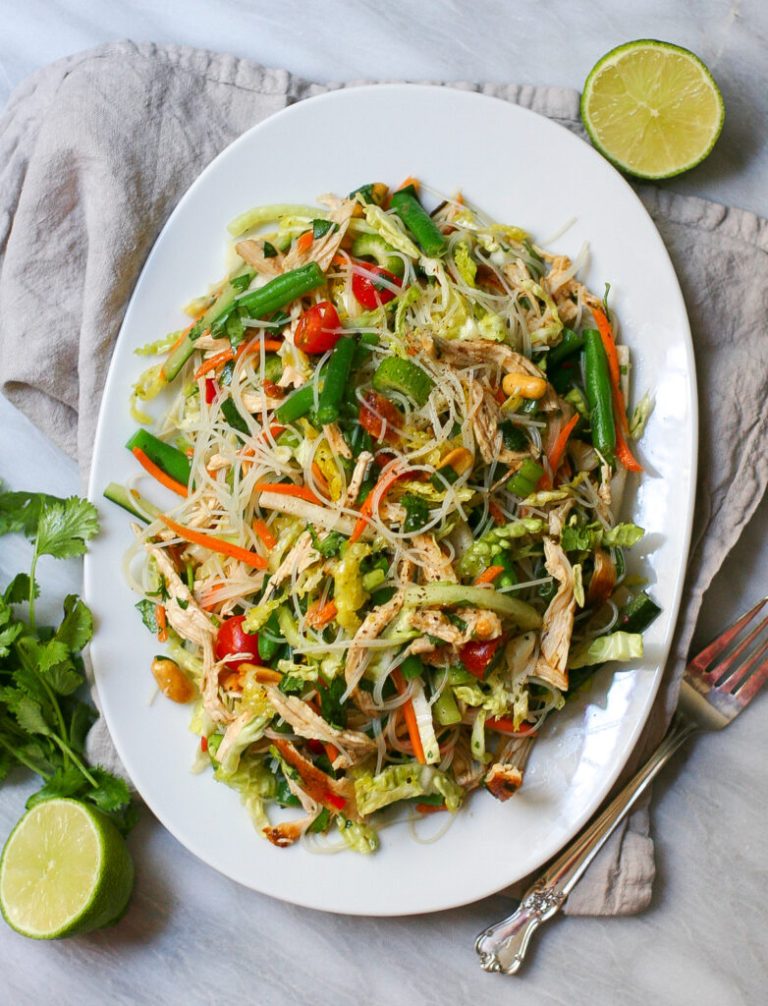
Vietnamese Chicken Salad, known in Vietnam as Gỏi Gà, is a light yet satisfying dish that’s full of fresh vegetables, fragrant herbs, tender chicken, and a bright fish sauce dressing. Every bite offers a delicious combination of savory, tangy, sweet, and slightly spicy flavors, along with plenty of crunchy textures from cabbage, peanuts, and optional crispy shallots.

This refreshing salad is perfect as a light lunch, appetizer, or healthy dinner. It also makes an excellent dish for warm weather, family gatherings, or meal prep since many of the ingredients can be prepared ahead of time and assembled just before serving.

1. Vietnamese Chicken Salad Recipe (Yield: 4 Servings)

Ingredients

For the Chicken

  • 1 pound (454 g) boneless, skinless chicken
  • 1 tablespoon vegetable oil or grapeseed oil
  • 1 tablespoon fish sauce (or soy sauce)
  • 3 cloves garlic, crushed or finely minced
  • 1 tablespoon grated or minced fresh ginger
  • Freshly ground black pepper, to taste

For the Fish Sauce Dressing

  • 3 tablespoons fish sauce
  • 1/4 cup water
  • 2 teaspoons grated fresh ginger
  • 2 cloves garlic, finely minced or crushed
  • 1–2 red chilies, minced
  • 2 tablespoons fresh lime juice, or more to taste
  • 2 teaspoons sugar (or sugar substitute)
  • 2 teaspoons rice vinegar (optional)

For the Salad

  • 6 cups thinly shredded cabbage (green, Napa, or a combination)
  • 1 cup chopped fresh herbs (Vietnamese coriander, mint, basil, cilantro, or a combination)
  • 1/4 cup shredded or julienned carrots
  • 1/4 cup crushed roasted peanuts
  • 1/4 cup fried shallots (optional)
  • 2 tablespoons fried garlic (optional)
  • 1/4 cup pickled red onions (optional)

Instructions

In a medium bowl, combine the vegetable oil, fish sauce, minced garlic, grated ginger, and black pepper. Stir until well mixed.

Add the chicken to the marinade and coat every piece evenly. Cover and refrigerate for at least 30 minutes. For deeper flavor, marinate for up to 2 hours.

Heat a large skillet over medium-high heat. Add the marinated chicken and cook for about 5 to 6 minutes per side, depending on thickness, until golden brown and the internal temperature reaches 165°F (74°C).

Transfer the cooked chicken to a cutting board and allow it to rest for 5 to 10 minutes. Resting keeps the meat juicy and makes it easier to slice.

Slice or shred the chicken into bite-sized strips.

While the chicken rests, prepare the dressing. In a small bowl, whisk together the fish sauce, water, grated ginger, minced garlic, minced chilies, lime juice, sugar, and rice vinegar until the sugar completely dissolves.

Taste the dressing and adjust it to your preference. Add more lime juice for extra brightness, a little sugar for additional sweetness, or another splash of fish sauce for a stronger savory flavor.

Place the shredded cabbage, carrots, and fresh herbs into a large salad bowl.

Add the sliced chicken and gently toss everything together.

Pour about three-quarters of the dressing over the salad and toss gently until all of the ingredients are lightly coated. Add more dressing if desired.

Sprinkle the crushed roasted peanuts evenly over the salad.

Top with fried shallots, fried garlic, and pickled red onions if using.

Serve immediately while the vegetables remain crisp and the herbs are fresh. This salad pairs beautifully with steamed rice, crispy shrimp crackers, or can be enjoyed on its own as a complete meal.

2. Tips for Perfect Vietnamese Chicken Salad

Use freshly cooked chicken instead of pre-packaged shredded chicken for the best flavor and texture.

Slice the cabbage very thinly so it absorbs the dressing evenly while remaining crisp and refreshing.

Combine several fresh herbs such as mint, cilantro, Thai basil, and Vietnamese coriander to create the authentic herbal aroma found in traditional Vietnamese salads.

Prepare the dressing in advance and chill it for 20 to 30 minutes before serving. This allows the flavors to blend together beautifully.

Add the dressing just before serving to keep the vegetables crisp and prevent the salad from becoming watery.

Toast the peanuts yourself for the freshest flavor and extra crunch.

Adjust the balance of fish sauce, lime juice, and sugar until the dressing tastes bright, savory, and slightly sweet. This balance is the hallmark of authentic Vietnamese salads.

Serve the salad immediately after tossing for the freshest texture and flavor.

3. Frequently Asked Questions

Can I use rotisserie chicken instead of cooking fresh chicken?

Yes. Rotisserie chicken is a convenient option and works well for a quick version of this salad. Simply shred the meat and toss it with the dressing before assembling.

Can I prepare this salad ahead of time?

You can prepare all of the ingredients separately in advance. Store the chicken, vegetables, herbs, and dressing individually, then combine everything just before serving.

What herbs are best for authentic Vietnamese Chicken Salad?

Mint, cilantro, Thai basil, and Vietnamese coriander (rau ram) create the most traditional flavor, but you can use any combination that is available.

Can I make the salad less spicy?

Absolutely. Reduce the amount of fresh chilies or leave them out entirely while keeping the rest of the dressing the same.

How long will leftovers keep?

Once dressed, the salad is best enjoyed within one day. Undressed vegetables and cooked chicken can be stored separately in the refrigerator for up to three days.

4. Nutrition Information

Nutrient Amount Per Serving
Calories 355
Protein 31 g
Total Fat 18 g
Saturated Fat 3 g
Carbohydrates 15 g
Fiber 3 g
Sugar 7 g
Sodium 920 mg
Cholesterol 85 mg
Potassium 520 mg

This Vietnamese Chicken Salad Recipe is a wonderful example of how fresh ingredients and simple preparation can create an incredibly flavorful meal. Tender chicken, crunchy vegetables, fragrant herbs, and a perfectly balanced fish sauce dressing come together to deliver a refreshing dish that’s both light and satisfying.

Easy enough for everyday lunches and impressive enough for entertaining, this salad is sure to become one of your favorite healthy recipes. Pair it with steamed rice or enjoy it on its own for an authentic Vietnamese-inspired meal that’s bursting with freshness in every bite.

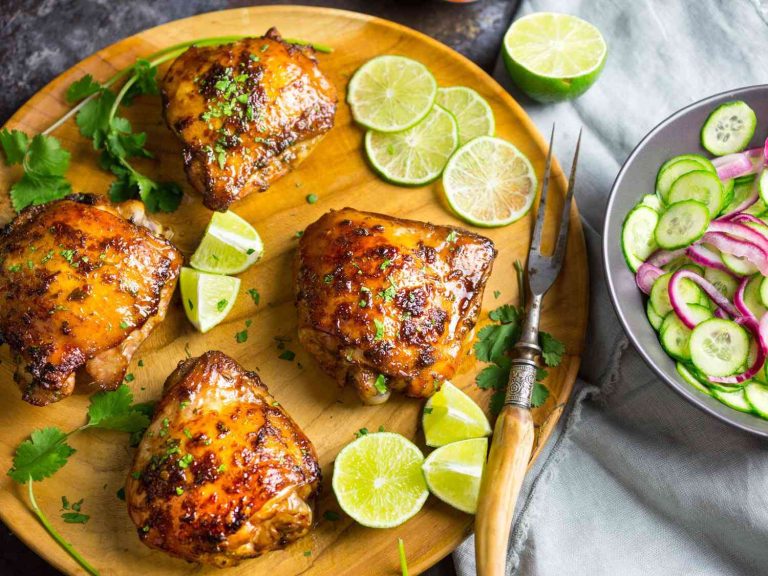
Vietnamese Style Baked Chicken Thighs combine the bold, balanced flavors that Vietnamese cuisine is known for into an easy oven-baked meal. A simple marinade made with fish sauce, soy sauce, garlic, shallots, lemongrass, and honey infuses the chicken with savory, slightly sweet, and aromatic flavors while the oven creates beautifully caramelized skin.

This recipe is perfect for weeknight dinners, meal prep, or casual family gatherings. Serve the chicken with steamed jasmine rice, cucumber slices, pickled vegetables, or a fresh salad for a satisfying meal that’s both comforting and full of authentic Vietnamese-inspired flavor.

1. Vietnamese Style Baked Chicken Thighs Recipe (Yield: 4 Servings)

Ingredients

  • 4 chicken thighs (bone-in, skin-on)
  • 2 tablespoons fish sauce
  • 2 tablespoons soy sauce
  • 2 tablespoons honey or brown sugar
  • 1 tablespoon minced garlic
  • 1 tablespoon minced shallots
  • 1 tablespoon finely chopped lemongrass or lemongrass paste
  • 1 tablespoon vegetable oil or melted butter
  • 1/2 teaspoon ground black pepper
  • 1/4 teaspoon five-spice powder (optional, for extra depth of flavor)
  • 1 tablespoon sesame oil
  • Fresh cilantro, for garnish
  • Sliced green onions, for garnish

Instructions

Preheat your oven to 400°F (200°C). Lightly grease a baking dish or line a baking sheet with parchment paper or aluminum foil for easier cleanup.

Pat the chicken thighs dry with paper towels. Removing excess moisture helps the skin become crisp and allows the marinade to adhere better.

In a medium bowl, combine the fish sauce, soy sauce, honey or brown sugar, minced garlic, minced shallots, chopped lemongrass, vegetable oil, sesame oil, black pepper, and five-spice powder if using. Stir until the honey dissolves and the marinade is well blended.

Place the chicken thighs into a large zip-top bag or shallow dish. Pour the marinade over the chicken, making sure every piece is evenly coated. Massage the marinade into the chicken, including underneath the skin whenever possible for maximum flavor.

Cover and refrigerate for at least 2 hours. For the best flavor, marinate overnight.

Remove the chicken from the refrigerator about 20 minutes before baking to allow it to come closer to room temperature. This promotes more even cooking.

Arrange the chicken thighs skin-side up on the prepared baking dish. Pour any remaining marinade around the chicken, but avoid covering the skin so it can crisp nicely.

Bake for 35 to 40 minutes, depending on the size of the chicken thighs. Halfway through cooking, spoon a small amount of the pan juices over the meat, avoiding repeated brushing on the skin to help it stay crisp.

When the chicken reaches an internal temperature of 165°F (74°C), switch the oven to broil for 2 to 4 minutes. Watch carefully as the sugars in the marinade caramelize quickly, creating beautifully browned, slightly crispy skin.

Remove the chicken from the oven and let it rest for about 5 minutes before serving. Resting allows the juices to redistribute throughout the meat.

Transfer the chicken to a serving platter and garnish generously with fresh cilantro and sliced green onions.

Serve hot with steamed jasmine rice, cucumber slices, pickled carrots and daikon, stir-fried vegetables, or a simple Vietnamese herb salad.

2. Tips for Perfect Vietnamese Style Baked Chicken Thighs

Choose bone-in, skin-on chicken thighs for the juiciest results. The bones help retain moisture while the skin becomes beautifully caramelized.

Marinate the chicken overnight whenever possible. The extra time allows the garlic, lemongrass, and fish sauce to fully penetrate the meat.

Finely mince the garlic, shallots, and lemongrass so they blend evenly into the marinade and don’t burn during baking.

Pat the chicken dry before marinating. This helps the seasoning stick better and promotes crispier skin.

Bake the chicken skin-side up without overcrowding the pan. Good air circulation encourages even browning.

Finish under the broiler for a few minutes to achieve the signature caramelized appearance, but monitor closely since the honey can brown very quickly.

Allow the chicken to rest before serving to keep it juicy when sliced or bitten into.

Pair the chicken with steamed rice and fresh vegetables to balance the rich, savory flavors of the marinade.

3. Frequently Asked Questions

Can I use boneless chicken thighs instead?

Yes. Boneless thighs cook faster, usually in about 25 to 30 minutes. Always check that the internal temperature reaches 165°F (74°C).

Can I prepare the marinade ahead of time?

Absolutely. The marinade can be mixed up to three days in advance and stored in the refrigerator until you’re ready to use it.

Can I grill the chicken instead of baking it?

Yes. This marinade works wonderfully on the grill. Cook over medium heat, turning occasionally, until the chicken is fully cooked and nicely caramelized.

What side dishes go well with Vietnamese baked chicken?

Steamed jasmine rice, pickled vegetables, cucumber salad, sautéed greens, fresh herbs, or vermicelli noodles all pair beautifully with this dish.

How should I store leftovers?

Store cooled chicken in an airtight container in the refrigerator for up to four days. Reheat gently in the oven or air fryer to help maintain the crispy skin.

4. Nutrition Information

Nutrient Amount Per Serving
Calories 430
Protein 29 g
Total Fat 29 g
Saturated Fat 7 g
Carbohydrates 11 g
Fiber 0 g
Sugar 9 g
Sodium 940 mg
Cholesterol 145 mg
Iron 2 mg

This Vietnamese Style Baked Chicken Thighs Recipe is an easy way to bring the bold flavors of Vietnamese cooking into your kitchen. The combination of fish sauce, lemongrass, garlic, shallots, and honey creates a beautifully balanced marinade that transforms simple chicken thighs into a flavorful and satisfying meal.

Perfect for busy weeknights or weekend family dinners, this recipe is simple enough for beginners while delivering impressive results every time. Serve it with steamed rice and fresh vegetables, and you’ll have a comforting homemade meal that’s sure to become a favorite.

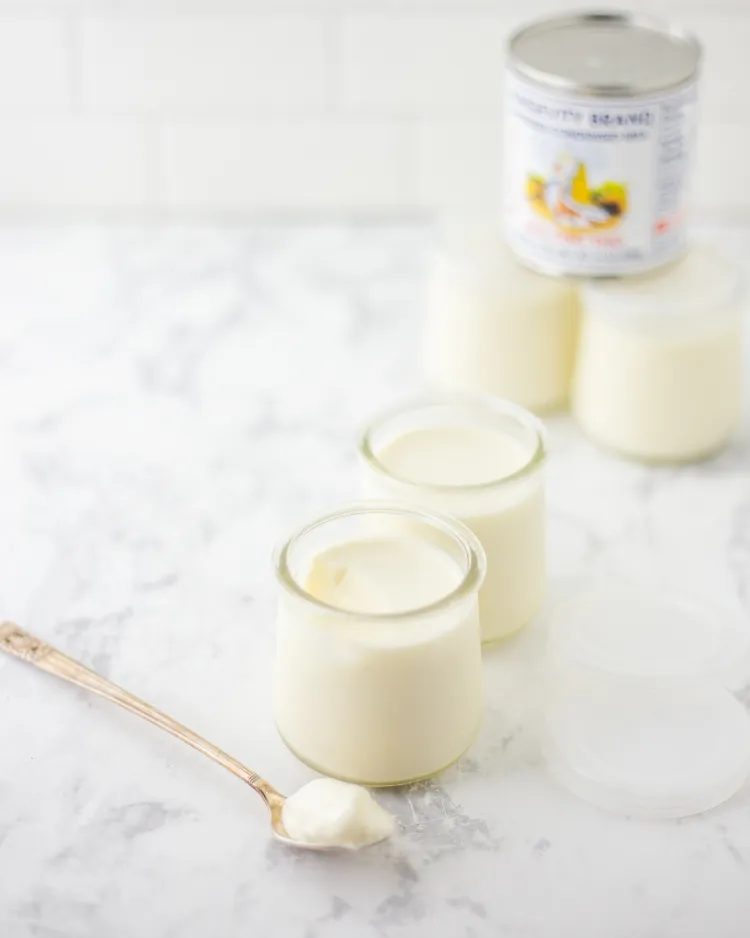
Vietnamese Yogurt, known as Sữa Chua, is a beloved homemade dessert enjoyed throughout Vietnam. Unlike many traditional yogurts, Vietnamese yogurt is made with sweetened condensed milk, giving it a naturally rich, creamy texture and a balanced sweetness. It’s delicious served chilled on its own or topped with fresh fruit, coffee, or crushed ice for a refreshing treat.

Although making yogurt may sound complicated, the process is actually quite simple. With just a handful of ingredients and a little patience during fermentation, you can create smooth, silky yogurt that tastes just like the homemade version found in Vietnamese homes and cafés.

1. Vietnamese Yogurt Recipe (Yield: 8 Servings)

Ingredients

  • 1 (14-ounce) can sweetened condensed milk
  • 4 cups whole milk
  • 1 cup hot water (not boiling)
  • ½ cup plain yogurt with live active cultures (store-bought or homemade, at room temperature)
  • Glass jars or small containers with lids for fermenting

Instructions

Begin by washing and sterilizing the glass jars or containers with hot water. Allow them to air dry completely before filling.

Pour the sweetened condensed milk into a large mixing bowl.

Add the hot water and whisk until the condensed milk dissolves completely into a smooth mixture.

Pour in the whole milk and continue whisking until everything is well combined. The milk mixture should feel warm but not hot. Ideally, it should be around 105°F to 110°F (40°C to 43°C). If the mixture is warmer than this, allow it to cool slightly before adding the yogurt starter.

Place the plain yogurt at room temperature for about 30 minutes before using. Cold yogurt can slow the fermentation process.

Add the yogurt starter to the warm milk mixture and gently whisk until evenly incorporated. Avoid vigorous mixing, which can affect the final texture.

Pour the mixture evenly into the prepared glass jars, leaving a little space at the top.

Cover each jar loosely with its lid or plastic wrap.

Arrange the jars in a large pot, insulated cooler, yogurt maker, or another container suitable for fermentation.

Pour warm water around the jars until it reaches about halfway up the sides of the containers. The water should be warm to the touch but not hot enough to burn your finger.

Cover the pot or cooler with a lid and wrap it with a thick towel if needed to help retain warmth.

Allow the yogurt to ferment undisturbed for 8 to 10 hours. For a tangier flavor, ferment for up to 12 hours.

After fermentation, carefully remove the jars and refrigerate them for at least 4 hours before serving. Chilling allows the yogurt to fully set and develop its signature creamy texture.

Serve cold as is, or enjoy it with fresh berries, tropical fruit, granola, honey, crushed ice, or even Vietnamese-style coffee poured over the top for a popular café treat.

Store homemade Vietnamese yogurt in the refrigerator for up to one week.

2. Tips for Perfect Vietnamese Yogurt

Use whole milk for the creamiest texture. Lower-fat milk produces a thinner yogurt.

Choose plain yogurt that contains live active cultures. This is essential for successful fermentation.

Allow the yogurt starter to reach room temperature before mixing it into the milk to help protect the beneficial bacteria.

Keep the fermentation temperature warm and consistent. Temperatures that are too cool can prevent the yogurt from setting properly.

Avoid moving or shaking the jars during fermentation. Leaving them undisturbed helps create a smooth, even texture.

Do not add the yogurt starter while the milk mixture is too hot, as excessive heat can kill the active cultures.

Refrigerate the yogurt for several hours before serving. This improves both the texture and flavor.

Save a small portion of your homemade yogurt to use as the starter for your next batch.

3. Frequently Asked Questions

Why didn’t my yogurt set properly?

The most common reasons are using milk that was too hot, a starter without active cultures, or fermenting at a temperature that was too cool.

Can I use low-fat or skim milk?

Yes, but the yogurt will have a lighter consistency. Whole milk creates the traditional rich and creamy Vietnamese texture.

How long does homemade Vietnamese yogurt last?

Stored in airtight containers, it stays fresh in the refrigerator for about one week.

Can I flavor the yogurt with fruit?

Yes. It’s best to add fresh fruit, jam, honey, or other flavorings after the yogurt has finished fermenting to maintain the best texture.

Can I reuse homemade yogurt as a starter?

Absolutely. Reserve about ½ cup from a fresh batch and use it within one week to start your next batch of yogurt.

4. Nutrition Information

Nutrient Amount Per Serving
Calories 180
Protein 6 g
Total Fat 5 g
Saturated Fat 3 g
Carbohydrates 28 g
Sugar 27 g
Calcium 220 mg
Sodium 90 mg
Cholesterol 18 mg
Potassium 290 mg

Making homemade Vietnamese Yogurt is a rewarding way to enjoy one of Vietnam’s most popular desserts. With only a few pantry staples and a simple fermentation process, you can create yogurt that’s creamy, lightly tangy, and perfectly sweet every time.

Once you’ve mastered this Vietnamese Yogurt Recipe, you’ll find yourself making it regularly for breakfast, snacks, or dessert. Enjoy it plain, topped with fruit, or paired with Vietnamese coffee for a delicious homemade treat that’s both comforting and refreshing.

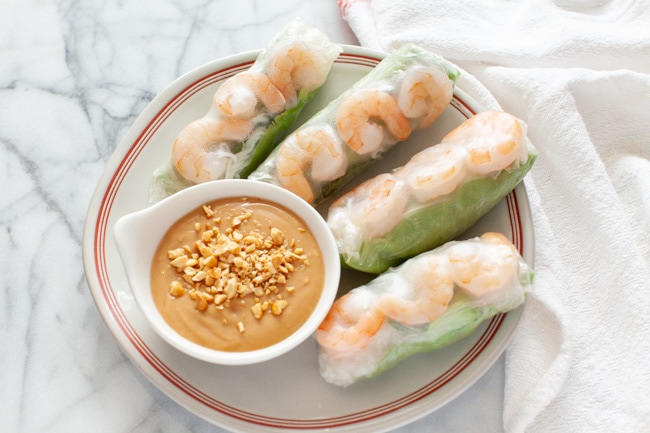
Vietnamese Peanut Sauce is the perfect dipping sauce for fresh spring rolls, summer rolls, grilled meats, and even noodles. It has a creamy texture with a delicious balance of nutty, sweet, savory, tangy, and slightly garlicky flavors. Best of all, it comes together in just a few minutes using simple pantry ingredients.

Making your own peanut sauce at home allows you to adjust the sweetness, saltiness, and thickness to suit your taste. This easy recipe is great for family dinners, appetizers, meal prep, or entertaining guests, and it stores well in the refrigerator for several days.

1. Vietnamese Peanut Sauce For Spring Rolls (Yield: 8 Servings)

Ingredients

  • 1/2 cup creamy peanut butter
  • 2 tablespoons hoisin sauce
  • 2 tablespoons soy sauce
  • 1 tablespoon rice vinegar
  • 1 tablespoon lime juice
  • 1 tablespoon honey or brown sugar (adjust to taste)
  • 1–2 garlic cloves, minced
  • 1/2 teaspoon sesame oil (optional, for extra flavor)
  • 1/4 cup warm water (adjust as needed for desired consistency)

Instructions

Add the creamy peanut butter to a medium mixing bowl. Using room-temperature peanut butter makes it easier to combine with the other ingredients.

Add the hoisin sauce, soy sauce, rice vinegar, lime juice, honey or brown sugar, minced garlic, and sesame oil if using.

Whisk the ingredients together until they begin forming a thick, smooth mixture. At first, the sauce may seem stiff, but it will loosen as the liquid is incorporated.

Gradually pour in the warm water, adding only a tablespoon or two at a time while whisking continuously. Continue adding water until the sauce reaches your preferred consistency. For dipping spring rolls, the sauce should be thick enough to coat the rolls but still pour easily from a spoon.

Taste the sauce and adjust the seasoning if needed. Add a little more honey for extra sweetness, another splash of soy sauce for a deeper savory flavor, or a squeeze of lime juice if you’d like a brighter finish.

Allow the sauce to rest for about 10 minutes before serving. This gives the garlic time to mellow slightly while allowing all of the flavors to blend together.

If the sauce thickens after sitting, stir in a teaspoon or two of warm water until it returns to the desired consistency.

Transfer the peanut sauce to a serving bowl. If desired, garnish with chopped roasted peanuts, sliced green onions, sesame seeds, or a pinch of crushed red pepper flakes for extra flavor and texture.

Serve alongside Vietnamese fresh spring rolls, grilled shrimp, grilled pork, chicken skewers, lettuce wraps, rice paper rolls, or drizzle it over rice noodle bowls.

Store any leftovers in an airtight container in the refrigerator for up to one week. Stir well before serving again, adding a little warm water if necessary to loosen the sauce.

2. Tips for Perfect Vietnamese Peanut Sauce

Use creamy peanut butter for the smoothest texture. Natural peanut butter can also be used, but stir it thoroughly before measuring since the oil often separates.

Add the warm water gradually instead of all at once. This gives you better control over the final consistency.

Freshly minced garlic provides the best flavor. Finely mince or grate it so it blends evenly into the sauce without leaving large pieces.

Balance the flavors before serving. Every brand of peanut butter and hoisin sauce varies slightly in sweetness and saltiness, so taste and adjust as needed.

Allow the sauce to rest for several minutes before serving. This helps the ingredients fully combine and creates a more balanced flavor.

If serving the sauce chilled from the refrigerator, stir it well before using because it naturally thickens as it cools.

For a spicy version, mix in a little sambal oelek, chili garlic sauce, or a pinch of cayenne pepper.

For an extra authentic presentation, garnish with crushed roasted peanuts and finely sliced green onions just before serving.

3. Frequently Asked Questions

Can I make the peanut sauce ahead of time?

Yes. The sauce can be prepared several days in advance and stored in an airtight container in the refrigerator. Stir before serving and thin with warm water if needed.

What foods pair well with Vietnamese peanut sauce?

Besides fresh spring rolls, it pairs wonderfully with grilled chicken, pork, shrimp, beef skewers, rice noodle bowls, lettuce wraps, steamed vegetables, and even as a sandwich spread.

Can I use crunchy peanut butter instead of creamy?

Yes. Crunchy peanut butter adds extra texture, although creamy peanut butter produces the classic smooth dipping sauce most commonly served with Vietnamese spring rolls.

Why did my peanut sauce become too thick?

Peanut butter naturally thickens as it sits or chills. Simply whisk in a small amount of warm water until it reaches your preferred consistency.

Can I freeze Vietnamese peanut sauce?

Yes. Freeze it in an airtight container for up to three months. Thaw overnight in the refrigerator and stir well before serving.

4. Nutrition Information

Nutrient Amount Per Serving
Calories 135
Protein 4 g
Total Fat 10 g
Saturated Fat 2 g
Carbohydrates 10 g
Fiber 1 g
Sugar 7 g
Sodium 340 mg
Cholesterol 0 mg
Potassium 145 mg

This Vietnamese Peanut Sauce For Spring Rolls is a simple homemade recipe that delivers authentic flavor with minimal effort. The creamy peanut butter, savory hoisin sauce, fresh garlic, and bright lime juice create a perfectly balanced dipping sauce that’s delicious with spring rolls and many other dishes.

Once you try making this sauce from scratch, you’ll appreciate how easy it is to customize for your own taste. Keep a batch in the refrigerator for quick appetizers, healthy lunches, or flavorful weeknight meals, and you’ll always have a versatile dipping sauce ready to enjoy.

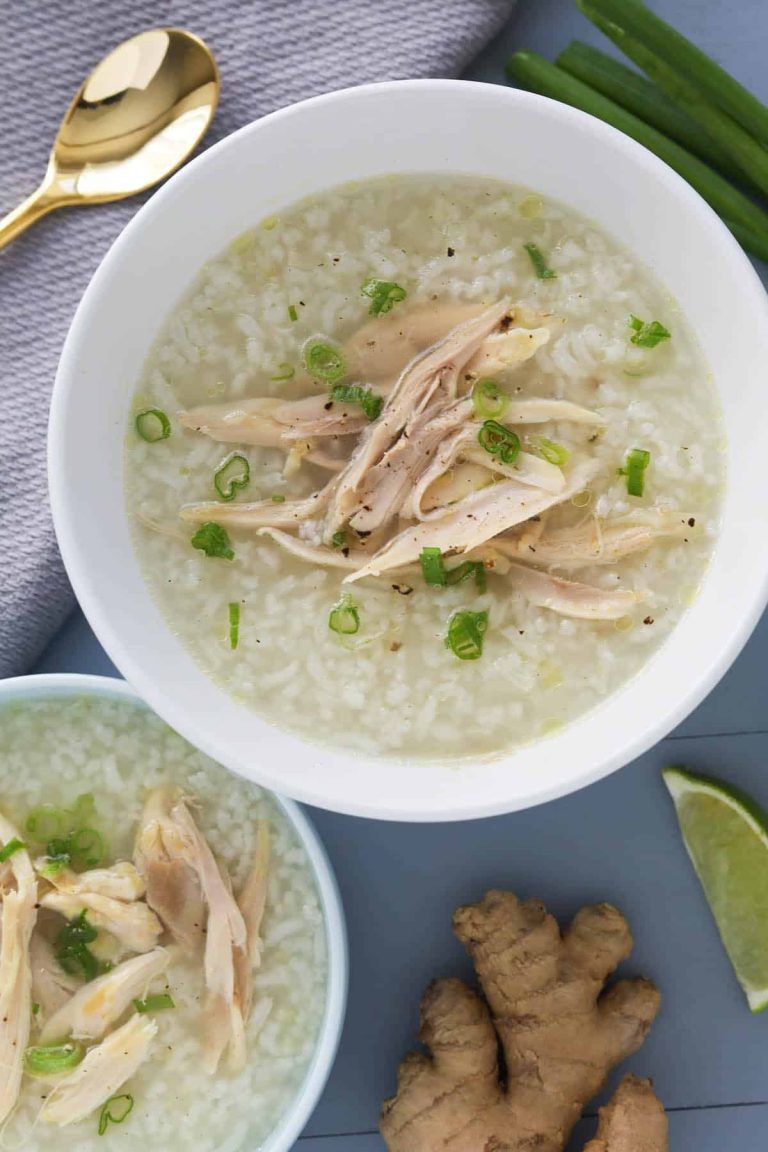
Vietnamese Chicken Rice Porridge, or Cháo Gà, is a classic comfort food enjoyed throughout Vietnam. This hearty dish features tender shredded chicken simmered with rice until it becomes smooth and creamy, then topped with fresh herbs, green onions, and crispy fried shallots for extra flavor.

Simple yet incredibly satisfying, Cháo Gà is perfect for breakfast, lunch, or a light dinner. It’s easy to make with everyday ingredients and is especially comforting on chilly days or whenever you’re craving a warm, nourishing meal.

1. Vietnamese Chicken Rice Porridge ( Yield: 12 Serving )

Ingredients

  • 3 lb chicken or turkey, bone-in, cooked or raw
  • 28 c filtered water
  • 87 g fresh ginger root, peeled and sliced into 1/4-inch pieces
  • 1 large yellow onion, halved
  • 2 tbsp salt
  • 2 tbsp fish sauce
  • 334 g long grain white rice (about 2 scoops)
  • 334 g short grain white rice (about 2 scoops)

Garnish

  • 2–3 tbsp fresh ginger, peeled and finely julienned
  • 3 stalks green onions, thinly sliced
  • 1 bunch cilantro, chopped into 1/3-inch pieces
  • Sambal chile paste, to taste

Instructions

If using raw chicken, rinse it under cold water and place it in a large stockpot. Add the filtered water, sliced ginger, halved onion, salt, and fish sauce. Bring to a gentle boil over medium-high heat, then reduce the heat to low. Simmer for 45–60 minutes, skimming off any foam that rises to the surface.

Once the chicken is fully cooked, remove it from the pot and let it cool slightly. If using cooked chicken or turkey, simply add the meat, ginger, onion, salt, fish sauce, and water to the pot and simmer for about 30 minutes to develop a flavorful broth.

While the chicken cools, remove the meat from the bones and shred it into bite-sized pieces. Discard the skin and bones or save them for making additional stock.

Rinse the long grain and short grain rice under cold water until the water runs mostly clear. Drain well.

Remove the ginger slices and onion from the broth, then stir in both types of rice. Bring the broth back to a gentle boil, then reduce the heat to low.

Simmer the rice for 45–60 minutes, stirring frequently to prevent it from sticking to the bottom of the pot. As the rice cooks, it will gradually break down and create a thick, creamy porridge. If the porridge becomes too thick, add a little more hot water until it reaches your desired consistency.

Return the shredded chicken or turkey to the pot and stir well. Simmer for another 5–10 minutes until the meat is heated through and the flavors are well combined. Taste and adjust the seasoning with additional salt or fish sauce if needed.

Ladle the hot chicken rice porridge into serving bowls. Garnish with julienned fresh ginger, sliced green onions, chopped cilantro, and sambal chile paste to taste. Serve immediately while hot.

2. Tips for Perfect Vietnamese Chicken Rice Porridge

Using bone-in poultry is essential for building a rich, naturally sweet broth. The bones release collagen and flavor that give the porridge its signature depth without heaviness.

Combining long grain and short grain rice is a traditional technique that improves texture. Long grain rice helps keep the porridge light, while short grain rice contributes creaminess.

Stirring regularly prevents rice from sticking and ensures even cooking. As the porridge thickens, gentle stirring becomes even more important.

Fresh ginger plays a key role in flavor and digestion. Adding some ginger during cooking and more as garnish creates layers of warmth and aroma.

Adjust the thickness to your preference. If the porridge becomes too thick, simply add hot water or broth and stir until smooth.

3. Frequently Asked Questions

What makes Vietnamese chicken rice porridge different from other congee styles?

Vietnamese porridge is generally lighter and more broth-forward, with visible rice grains rather than a fully broken-down texture.

Can this porridge be made ahead of time?

Yes, it can be prepared in advance, but it will thicken as it cools. Reheat gently with added water or broth to restore consistency.

Is fish sauce necessary in this recipe?

Fish sauce adds depth and umami, but the porridge can still be enjoyable without it if you prefer a milder flavor.

What type of chicken works best?

Whole chicken or bone-in thighs and drumsticks are ideal, as they provide both meat and flavorful bones.

Can this dish be served to children or elderly family members?

Yes, cháo gà is soft, easy to digest, and commonly served to people of all ages.

How spicy should Vietnamese chicken rice porridge be?

The base porridge is mild. Heat is added individually through sambal or chili, allowing everyone to customize their bowl.

4. Nutrition Information

Nutrient Amount per Serving
Calories 285 kcal
Protein 22 g
Carbohydrates 32 g
Fat 7 g
Saturated Fat 2 g
Fiber 1 g
Sodium 620 mg

Vietnamese Chicken Rice Porridge is more than just a meal—it is a symbol of comfort, care, and tradition. With its gentle flavors, nourishing broth, and customizable toppings, cháo gà fits effortlessly into everyday meals or special family gatherings.

This detailed recipe allows you to recreate an authentic Vietnamese experience at home, whether you are cooking for a crowd or seeking a soothing dish for yourself. By mastering the balance of rice, broth, and aromatics, you can enjoy a timeless dish that has warmed Vietnamese kitchens for generations.